OIDC for GitHub Actions
At Cloud Security Partners, we perform a lot of code reviews and Cloud Security Assessments. During these engagements, we see many different CI/CD patterns that cause us to raise our eyebrows. One situation in particular that we encounter relatively often is the unsafe use of AWS credentials. The CIS Benchmark for AWS indicates that Access Keys must be rotated every 90 days. And generally, IAM users should be avoided, instead roles should be utilized. OpenID Connect is an authentication standard, which when coupled with GitHub Actions, offers a more secure alternative for authentication when compared to utilizing traditional access keys.
Why OIDC vs Access Keys?
Access keys are long-lived and belong to an IAM account. This poses a significant problem in the event that the keys are compromised or leaked. It requires that the keys be rotated in AWS and then updated in GitHub. Often enough, this requires multiple parties to become involved (a GitHub repo Administrator and an AWS Administrator) and, in some cases, can cause downtime (i.e., if a system is still trying to make use of a revoked token).
OIDC aims to reduce the blast radius of a compromised token by moving from long-lived tokens to temporary credentials. By default, credentials utilized within OIDC flows expired in 60 minutes. This means that an attacker who was able to compromise these credentials would have at most 60 minutes of access (in a default configuration).
How does this work?
OIDC operates by establishing trust between AWS <-> GitHub Actions. It does so through several steps:
- Establishing GitHub Actions as an identity provider in AWS.
- Creating a role in AWS, which GitHub Actions will assume. This role defines the permissions, as well as the trusted entities (which, in this case, is using the Identity provider created in the previous step).
- Configuring GitHub Actions Workflows to utilize this trust to gain temporary access credentials.
Creating the Identity (Trust) Provider
First steps first, we need to create an identity provider in AWS. This provider will establish a pattern to grant access to AWS resources to entities that are external to AWS, such as GitHub users. The Identity Provider can be created through the AWS console or through Infrastructure-as-Code solutions, such as Terraform.
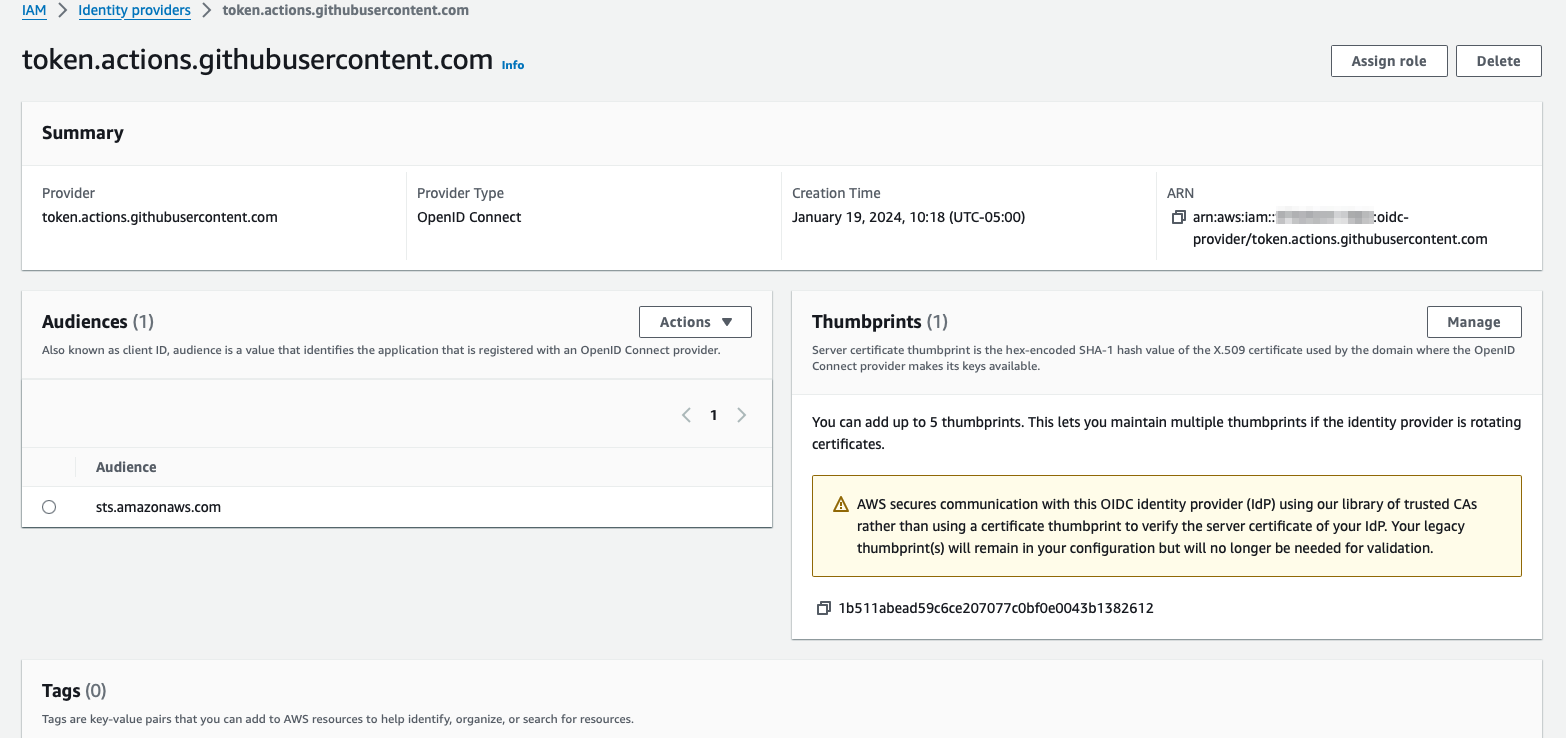
To create the Identity Provider via Console, head over to IAM and open the “Identity Providers” page. Add a provider, and click the “OpenID Connect” button. Then specify the provider URL, which is token.actions.githubusercontent.com. After that, we will need to fetch the thumbprint of the provider by clicking the “Get Thumbprint” button. Behind the scenes, this trust is secured through public-key cryptography.
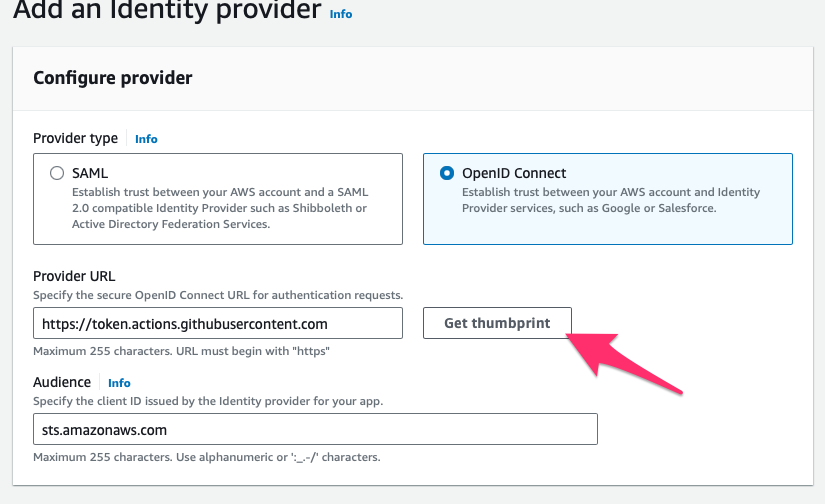
After which, we need to specify the audience. In this case, we have a single service making use of this identity, which will be the STS service. To ensure that the service has the privilege to make use of this IDP, we need to specify the audience: sts.amazonaws.com.
Terraform:
resource "aws_iam_openid_connect_provider" "githubOidc" {
  url = "https://token.actions.githubusercontent.com"

  client_id_list = [
    "sts.amazonaws.com"
  ]

  thumbprint_list = ["1b511abead59c6ce207077c0bf0e0043b1382612"]
}
Establishing the role
Once we’ve established the Identity Provider, we need to create a role that will leverage that provider. Navigate to the IAM -> Roles page to begin creating a new role.
The first step is to create a role with a “Trusted entity” type of “Web Identity”
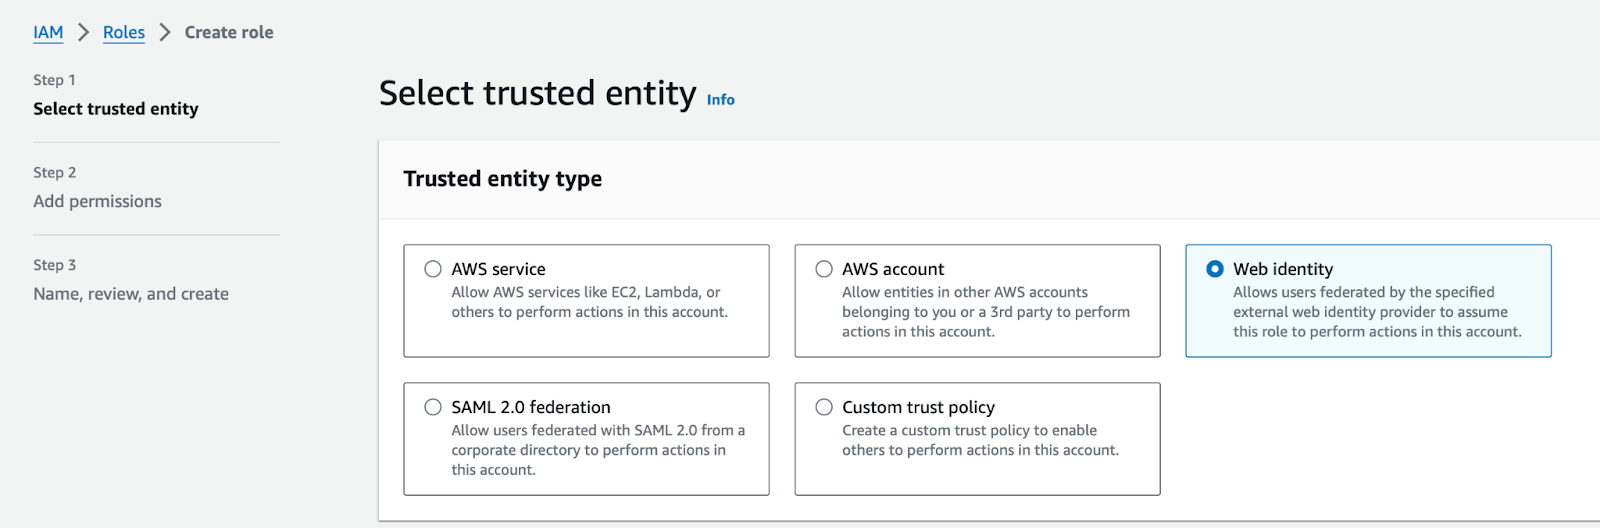
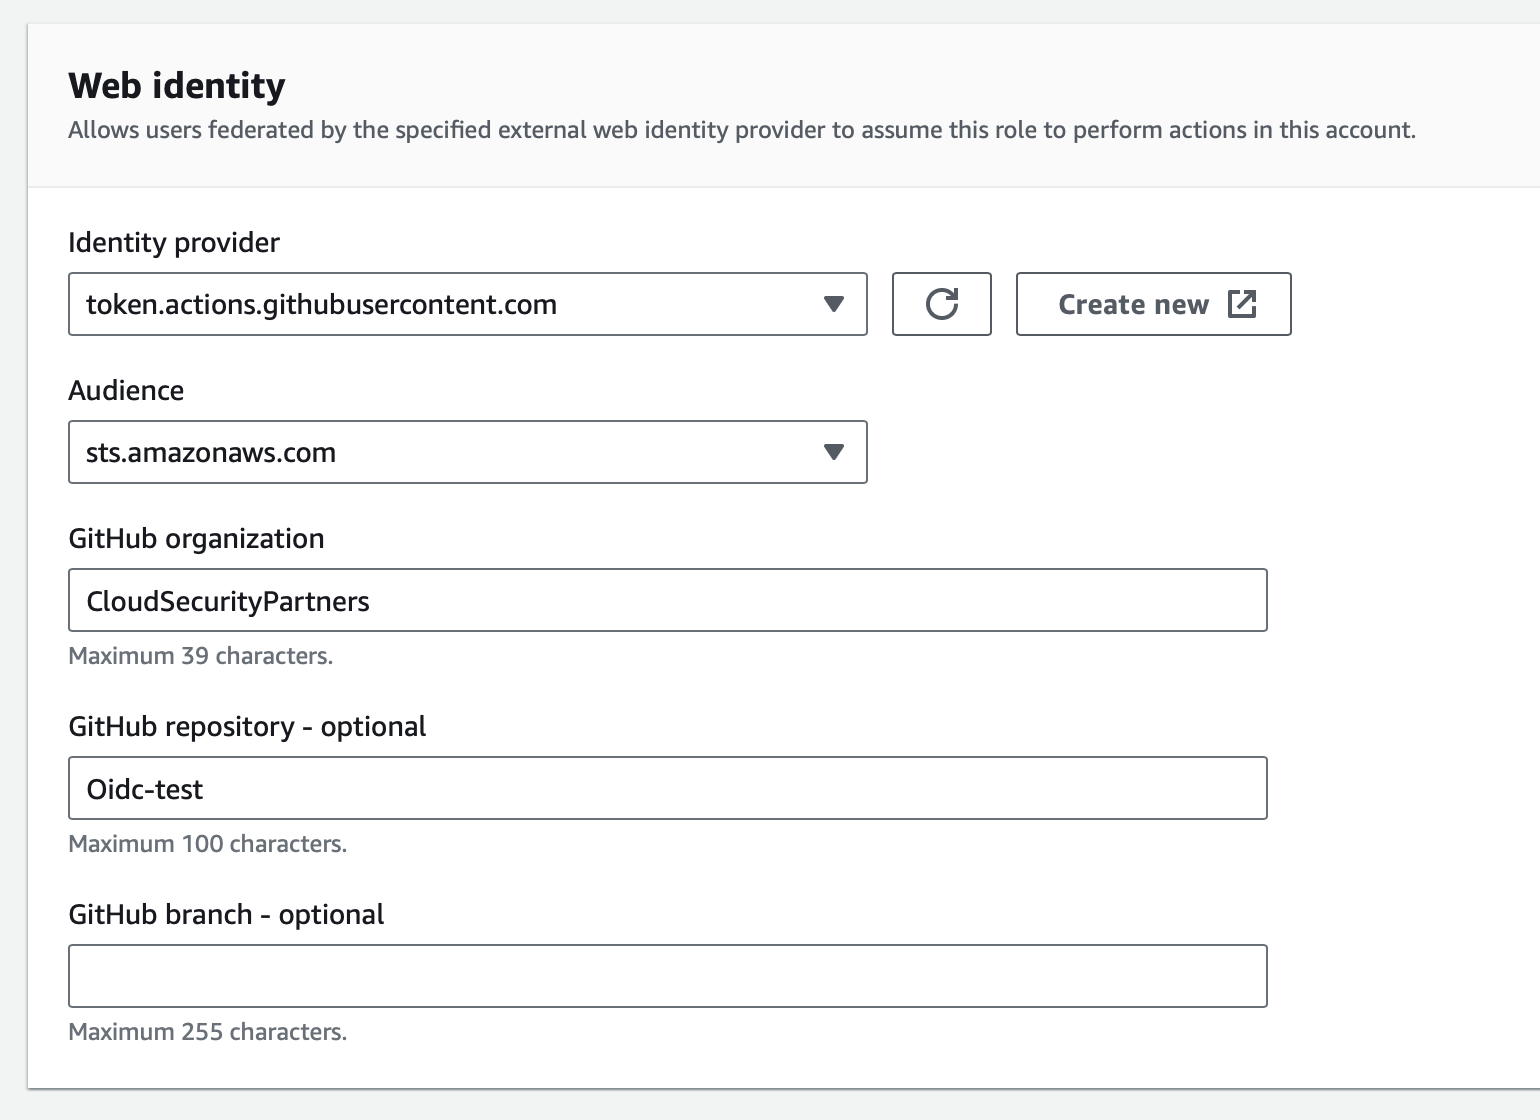
Once selected, we will need to select the Identity provider for the role. This is the provider that we created in the previous step, which we named “token.actions.githubusercontent.com”.
After that, specify the audience for this role to be the AWS STS service. This should be the only option available, as it was specified when we created the provider.
Provide the GitHub organization to which we want to grant access. This will ensure that the trust we are building between AWS <-> GitHub is limited to a single organization.
Specify the repository name within which our Actions Workflow will exist. This is an important step in ensuring that the trust is limited to a specific repository. If we don’t provide a repository here, then any workflow within the specified organization will be able to assume the role we are creating to access our AWS account.
Optionally, we can specify the branch from which we expect the action to run. For instance, if we wanted to limit role assumption to only the Main branch (think: after required approvals, security analysis, etc), we would specify that branch name here. Specifying a branch here is generally considered to be a security best practice but can slightly increase the friction in testing.
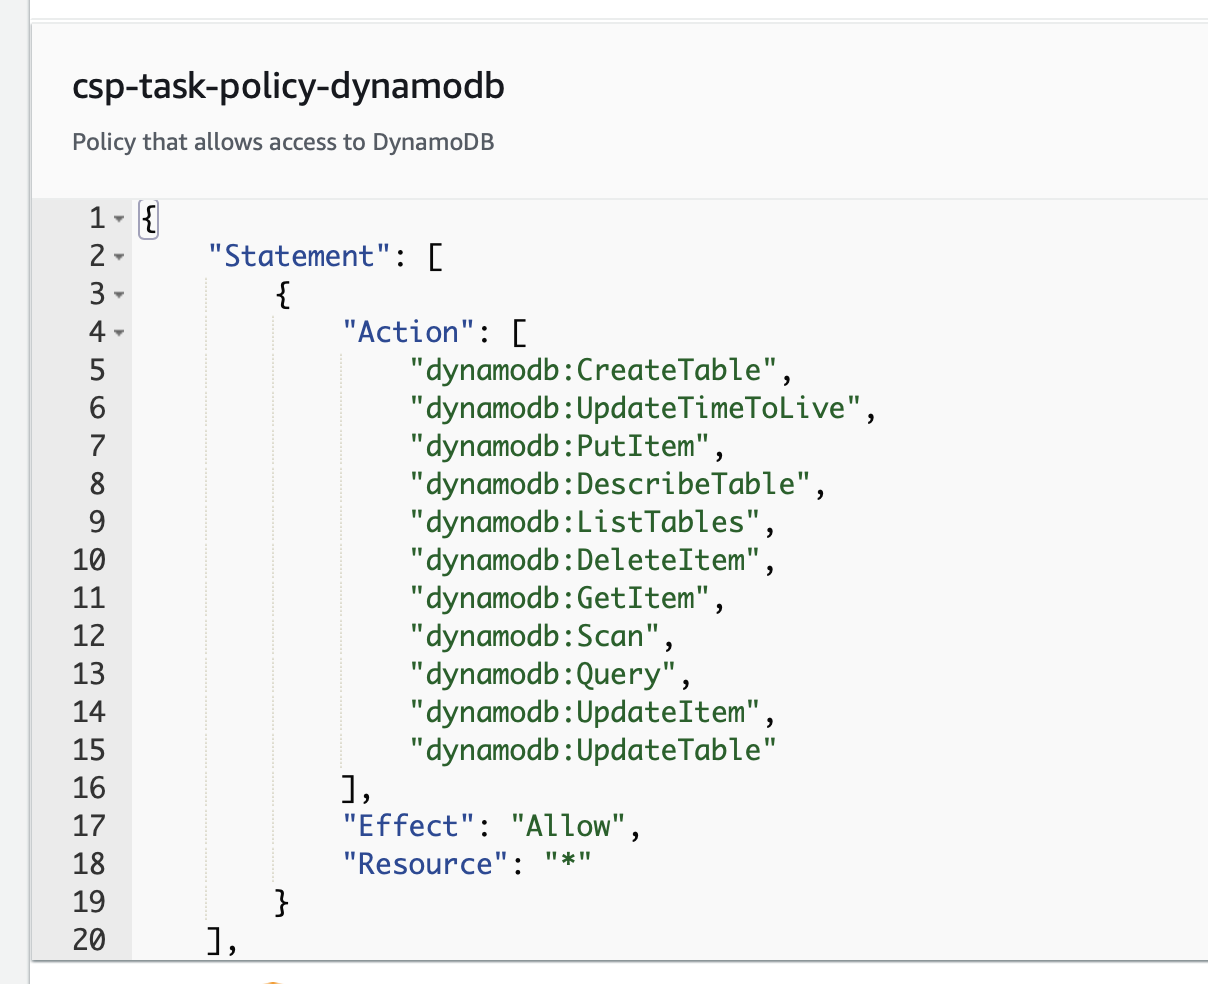
Once we’ve completed this step, it’s time to determine what permissions the role should have. This is accomplished by assigning one or more policies to the role. At this point it’s important to have an understanding as to what the GitHub action will be accomplishing. For instance, if we want the action to be able to have the ability to fully manage dynamoDB tables, we might use the policy as seen below:
Once you’ve attached the policy, the last and final steps are to provide a name, description, and any tags that may be of use. AWS then will generate the Trust Policy, which should look similar to the following:
{
    "Version": "2012-10-17",
    "Statement": [
        {
            "Effect": "Allow",
            "Action": "sts:AssumeRoleWithWebIdentity",
            "Principal": {
                "Federated": "arn:aws:iam::123456789012:oidc-provider/token.actions.githubusercontent.com"
            },
            "Condition": {
                "StringEquals": {
                    "token.actions.githubusercontent.com:aud": [
                        "sts.amazonaws.com"
                    ]
                },
                "StringLike": {
                    "token.actions.githubusercontent.com:sub": [
                        "repo:CloudSecurityPartners/Oidc-test"
                    ]
                }
            }
        }
    ]
}
Full Terraform:
resource "aws_iam_openid_connect_provider" "githubOidc" {
  url = "https://token.actions.githubusercontent.com"


  client_id_list = [
    "sts.amazonaws.com"
  ]


  thumbprint_list = ["1b511abead59c6ce207077c0bf0e0043b1382612"]
}


data "aws_iam_policy_document" "oidc_github_policy" {
   statement {
       effect = "Allow"
       actions = ["sts:AssumeRoleWithWebIdentity"]
       principals {
           type = "Federated"
           identifiers = [aws_iam_openid_connect_provider.githubOidc.arn]
       }
       condition {
           test = "StringEquals"
           variable = "token.actions.githubusercontent.com:aud"
           values = ["sts.amazonaws.com"]
       }
       condition {
           test = "StringLike"
           variable = "token.actions.githubusercontent.com:sub"
           values = ["repo:CloudSecurityPartners/Oidc-test:*"]
       }
   }
}


resource "aws_iam_role" "github_role" {
  name               = "GithubActionsRole"
  assume_role_policy = data.aws_iam_policy_document.oidc_github_policy.json
  inline_policy {
     name = "github_actions_policy"
     policy = data.aws_iam_policy_document.ecr-publisher.json
  }
}


data "aws_iam_policy_document" "ecr-publisher" {
 statement {
   effect    = "Allow"
   actions   = ["ecr:*"]
   resources = ["*"]
 }
}
Configuring GitHub Actions
Now that we have the role we want to assume, we need to configure our GitHub Action Workflow so that it can assume the role.
The first step is to ensure that the workflow file has the ability to update the id-token. We can ensure that it does by specifying the permissions for this attribute to be writable:
permissions:
 id-token: write
The next step is to utilize the actions workflow to assume the role we created and to set the credentials:
 - name: configure aws credentials
   uses: aws-actions/configure-aws-credentials@v3
   with:
     role-to-assume: arn:aws:iam::123456789012:role/GithubActionsRole
     role-session-name: samplerolesession
     aws-region: ${{ env.AWS_REGION }}
After this job step is complete the following job steps will have access to the temporary AWS credentials that have been granted to us by assuming the role. For instance,
- name: Login to Amazon ECR
  id: login-ecr
  uses: aws-actions/amazon-ecr-login@62f4f872db3836360b72999f4b87f1ff13310f3a
If our OIDC flow is not established correctly, the step defined above will fail.
Following is a full GitHub Actions Workflow, which will utilize OIDC to assume the role we created and use those credentials to publish an image to Elastic Container Registry:
name: AWS ECR Push
on:
   workflow_dispatch:
   push:
     branches:
         - 'master'
permissions:
 id-token: write
 contents: read

env:
 AWS_REGION: us-east-1
 ECR_REPOSITORY_URI: 123456789012.dkr.ecr.us-east-1.amazonaws.com
 IMAGE_NAME: csp-ecr

jobs:
 OIDCandECR:
   runs-on: ubuntu-latest
   steps:
     - name: Git clone the repository
       uses: actions/checkout@v4
     - name: configure aws credentials
       uses: aws-actions/configure-aws-credentials@v3
       with:
         role-to-assume: arn:aws:iam::123456789012:role/GithubActionsRole
         role-session-name: samplerolesession
         aws-region: ${{ env.AWS_REGION }}
     # Upload a file to AWS s3
     - name: Login to Amazon ECR
       id: login-ecr
       uses: aws-actions/amazon-ecr-login@62f4f872db3836360b72999f4b87f1ff13310f3a
     - name: Build, tag, and push image to Amazon ECR
       id: build-image
       env:
           ECR_REGISTRY: ${{ steps.login-ecr.outputs.registry }}
           IMAGE_TAG: ${{ github.sha }}
       run: |
           # Build a docker container and
           # push it to ECR so that it can
           # be deployed to ECS.
           docker build -t $IMAGE_NAME .
           docker tag $IMAGE_NAME:latest $ECR_REPOSITORY_URI/$IMAGE_NAME:latest
           docker push $ECR_REPOSITORY_URI/$IMAGE_NAME:latest
Conclusion
Implementing authentication between AWS <-> GitHub utilizing OIDC will help to ensure that access to your AWS account is more locked down. AWS Access Keys generally should not be utilized in situations where there are trust-based alternatives, such as OIDC.
Following these three steps will lead you to a successful OIDC implementation:
- Establishing GitHub Actions as an identity provider in AWS.
- Creating a role in AWS, which GitHub Actions will assume. This role defines the permissions, as well as the trusted entities (which, in this case, is using the Identity provider created in the previous step).
- Configuring GitHub Actions Workflows to utilize this trust to gain temporary access credentials.
If you ever need a second set of eyes on your organization's DevOps practices, feel free to reach out to CloudSecurityPartners.
Troubleshooting:
While it generally is fairly easy to get started integrating AWS with GitHub Actions via OIDC there are a few common pitfalls that folks can fall into.
“Could not assume role with OIDC: Not authorized to perform sts:AssumeRoleWithWebIdentity”
This error generally means one of two things:
- Our workflow is attempting to reference the wrong role. We can verify this easily by grabbing the ARN of our role from the AWS console, and ensure that we’re referencing the correct one.
- There is an issue with the Trust Policy portion of our role. The most common culprit here is an error in the policy’s Condition statement, that is specifically restricting our ability to assume the role. It’s quite common for folks to get caught up on the Subject (sub) portion of the policy.
- Check to ensure that we haven’t specified the wrong organization name, wrong repository, or wrong branch.
- Check to ensure that if we’re using wildcards ("repo:CloudSecurityPartners/*") that we’re using the StringLike directive in the policy instead of StringEquals.
“User: arn:aws:sts::123456789012:assumed-role/GithubActionsRole/samplerolesession is not authorized to perform: ecr:GetAuthorizationToken on resource”
This error indicates that we don’t have the proper permissions to perform the intended action. This means that our OIDC authentication was successful and that we have temporary credentials as expected. The solution here is to modify our policy to ensure it has the correct permissions to perform the action.
_________________________________________________________
John Poulin is CTO of Cloud Security Partners. John is an experienced Application Security Practitioner with over 10 years of experience in software development and security. Over his tenure, John has worked with many Fortune 500 companies and startups alike to perform secure code reviews, architecture, and design discussions, as well as threat modeling.